Saturday, December 20, 2008

david lebovitz--revisited

Winter is almost here--


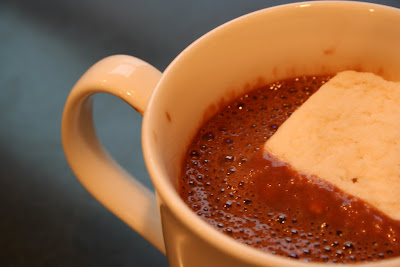
It's been perfect hot chocolate drinking weather...I was out taking pictures this afternoon and needed to warm up. Enter David Lebovitz and his fantastic chocolate recipes. I enjoyed a nice hot cup of hot chocolate (made with soymilk and Ghiradelli's) with marshmallows, and later in the afternoon, fresh baked chocolate chip cookies.


I recently read some new information (new to me anyway) about the proper care of butter in making cookies, from using it at the right temperature to creaming it properly. I was curious and anxious to bake cookies with my new found knowledge.

The cookies ended up pretty flat which I'm not used to, but the flavor is great. I especially love the chocolate chip to dough ratio. The outside is slightly crisp, but the inside is nice and chewy. I will probably make them again just to see if the flatness is due to the recipe or execution. Looking at the ones Heidi made, though, I'm thinking it's on my end...perhaps that butter article wasn't so good after all.

Don't they look tasty?

Friday, December 19, 2008

a long overdue intro to david lebovitz

I discovered David Lebovitz' blog last week...and oh how dangerous it is! I know I've heard about him countless places around the internet, but never actually took the time to visit his site. I instantly bookmarked a ton of recipes upon visiting his recipes page and honestly wish I had done so long ago. So far, I've had the Parisian hot chocolate, marshmallows, and cheesecake brownies, all of which are fantastic.


I really want to talk about the brownies today. I thought I had an amazing recipe with Jamie Oliver's fifteen brownies...I might have been mistaken. These brownies have that wonderfully fudgy texture paired with the sweet and tangy cream cheese. Honestly, I couldn't decide which was better even if I had them side by side. Nor would I want to!


As for the marshmallows and hot chocolate, I couldn't recommend them more! The hot chocolate tastes like a delicious, creamy, melted chocolate bar (which is basically what it is). If you go all out and make it with fancy chocolate, you wouldn't dare plop a marshmallow on top; save the marshmallows for other hot chocolate mixes or "lesser" chocolate...I personally used a half a king size Hershey bar (purchased super cheap at Grocery Outlet). A half batch of these marshallows do make quite a bit so I wouldn't recommend making more than that unless you plan on using them for something else (I've got my eye on some rocky road!).

Thursday, December 18, 2008

chai tea mix

A good cup of chai tea is always fabulous. I am partial to Oregon Chai brand; I really like its mild yet creamy flavor. I've had homemade chai before, the kind you actually boil with black tea and spices, but honestly the flavors are a bit strong for me. My palate has been trained, for better or worse.


I used this recipe for chai tea mix which I found on allrecipes. I found a couple recipes posted elsewhere which were exactly the same. I finally got a chance to use my vanilla sugar in making this which was great. This mix does have a bit of spiciness to it, but it is mild enough for all those chai tea concentrate drinkers out there (it was for me), so I definitely recommend at least trying a half batch.

Saturday, December 13, 2008

101 Cookbooks Experimentation

It's been a few weeks since my last post. I guess I've just let time slip by a bit too quickly. I actually made these recipes a while back, I found them from 101 Cookbooks. I really like that blog, there's always something interesting to try.

Nikki's Healthy Cookies


These sounded interesting...a "healthy" cookie?? Sounded so interesting, in fact, I made them. They were better warm, very banana-y. I suppose if you are an extreme banana fan, give these a go. Just be sure not to keep them in an airtight container, as they are moist. Personally, I did not like these cookies...

Amazing Black Bean Brownies


LOVED this recipe...who would have thought to put beans in brownies? I used leftover bean paste from this recipe. They have an incredible, moist texture which I love. Of course, the moist texture is not from chocolate and "fudgy", but fudgy none the less. I really can't describe it. I will be making these again for sure!

Anzac Cookies


Another lovely recipe for sweets (are you sensing a theme?). I really liked the butteriness of this cookie. These make for an excellent morning or afternoon snack paired with tea. Or, you know, to snack on all day.

Hummus en Fuego

My last 101 Cookbooks recipe I've made recently is for hummus. I really love Trader Joe's 4-pack hummus sampler, including roasted red pepper and garlic. I love this hummus recipe because it's got pretty basic stuff in it and easy to mix up and make how you prefer. I prepared the recipe as is, then added some roasted red peppers for extra flavor. Another excellent snack! I really love it paired with garlic pita chips (purchased at Whole Foods). This hummus would be perfect in wraps or on pizza.

Saturday, November 29, 2008

Thanksgiving leftovers?

Post turkey day, everyone's fridges are likely packed full of turkey, stuffing, cranberries, and other miscellaneous side dishes. What to do with these leftovers? Honestly, I have no idea. I'm very particular about how I eat my Thanksgiving foods: I need enough gravy to cover my potatoes and stuffing, turkey must be reheated to the proper piping hot temperature otherwise I find it utterly disgusting, and nothing, nothing should ever touch my dinner rolls.

Today I decided to make a little Thanksgiving leftover lunch. Originally I wanted to make a wrap, but then I decided to make a faux quesadilla, with cranberries, turkey, a bit of orange, lettuce, and black pepper white cheese. If I had to eat Thanksgiving foods every day of the year, this is how I would do it.

Next up, I think I'll try making a wrap with leftover turkey and roasted red pepper hummus, with some spinach thrown in for good measure.

Sunday, November 16, 2008

soup and sandwich dinner

It's fall and butternut squash is in season. What better way to prepare it than roast it, then make it into a soup?? I was really inspired to make soup after seeing Thai Spiced Pumpkin Soup on 101 cookbooks. The recipe does call for acorn squash, but I used butternut since I had it on hand and it tastes great!

Pair that with a grilled cheese sandwich, enhanced with cheese, apple, and bacon and you've got a seriously good meal.

This recipe comes from Tyler Florence, another one of my favorite Food Network chefs. If you are tired of eating the same old, I have nothing else to eat so grilled cheese will do, sandwich, be sure to give this one a try!

(Not your ordinary) Grilled Cheese

2 slices of bread
green apple, sliced thin
2 pieces of bacon, cooked until crisp
white cheddar cheese, sliced
dijon mustard
butter
  1. Heat a griddle over medium heat.
  2. To assemble the sandwich, spread a layer of dijon mustard on one slice of bread. Layer the cheese, apple, and bacon on top, then add the other slice of bread. Butter the bread and place onto the griddle, butter side down. Be sure to butter the other side of the sandwich at this time.
  3. Cook the sandwich until golden brown, flip, and cook the other side until golden as well.

Saturday, November 15, 2008

bacon cookies!

You either love the idea of pairing bacon with anything and everything, or you think that's the worst idea ever. I personally fall into the latter category--I love perfectly crisp bacon, however, this is the limit of my culinary imagination. Until recently.


I made bacon chocolate chip cookies over a week ago...not too bad. I scoured the internet for more bacon cookie recipes and found a couple that sounded really tasty, including these, originally found here.


The recipe seems to be a basic shortbread style cookie with some crisp chopped bacon thrown in for good measure. The sweetness of the cookie comes exclusively from the maple glaze and the optional (but oh so necessary), caramelized bacon placed on the top.


The caramelized bacon (pictured above) adds extra crunch and bacon flavor. Surprisingly, the bacon within the cookie itself doesn't add much flavor, so this "garnish" is essential.

In the end, I suppose you're a bacon with everything type person or you're not...

Pumpkin Chip Muffin Loaf

I was looking for a recipe with canned pumpkin so I could use up my leftovers from the pumpkin cookies I made. I finally settled on this recipe, but I wasn't entirely set on making cupcakes, mostly because I didn't have the cream cheese for the frosting but also because I wanted a coffeehouse-style baked item. (Side note: I really like the search function on allrecipes which allows you to search by ingredients you want and/or don't want...perfect when you need to use something left in your fridge!)


I followed the recipe exactly, using approximately 1 cup of regular sized chocolate chips. I poured into a loaf pan and baked for about an hour.

This makes a wonderful afternoon sweet snack, perfect with tea or coffee.

Weekend Cooking

I'm a cooking machine this weekend. I have hopes of making many things, including:
  • bacon cookies
  • peppermint ice cream
  • buttermilk biscuits
  • English muffins
  • and maybe some yeast bread
We'll see how much I actually accomplish ;) So far, I've got the ice cream setting up in the freezer and the cookies cooling, waiting for icing and a candied bacon topping.

Sunday, November 9, 2008

Individual Blueberry Persimmon Crumble

I went to Uwajimaya, an Asian grocery store here in the NW, and bought a bunch of interesting items. Never having seen them in grocery stores before, I sampled persimmon and bought a couple to experiment with.

Persimmons have an interesting flavor which I can't accurately describe. It reminds me of apple, but much more mild. I was thinking they would be great roasted with potatoes, or baked up in some kind of dessert. I decided to go with the latter.

Blueberry Persimmon Crumble

Ingredients

  • 2 persimmons, cubed
  • 1 cup blueberries
  • 2 tbsp brown sugar
  • 1 tbsp white sugar
  • 1 tbsp butter
Crumble Topping:
  • 1 1/2 tbsp flour
  • 2 tbsp brown sugar
  • 2 tsp butter, softened

Method

  1. Preheat oven to 400 degrees. Set aside 4 small ramekins.
  2. In a saucepan, combine fruit, sugars, and butter. Cook over medium low heat until a bit of juices release and thicken slightly.
  3. Meanwhile, combine the last set of ingredients for the crumble topping.
  4. Put the cooked fruit into the ramekins. Divide the topping evenly among the 4 servings.
  5. Bake in the oven for about 40 minutes, until topping browns slightly.

This makes for a nice fall dessert, perfect served on its own or with a small scoop of vanilla ice cream.

Pumpkin Cookies

I originally tried these at work when a coworker brought some in. I've never eaten anything like them before--soft like a biscuit or muffin, but with the sweetness of a cookie. I had to ask for the recipe. When I got it, I modified it a bit, using a different icing, subbing half the sugar for brown, and adding a bit of salt and vanilla. But in the end, I'm not sure those changes made that much of a difference because these are so good as is.

I did a search for other pumpkin cookie recipes and found a ton of them, each very similar. So apparently I've been out of the loop on this one.


Pumpkin Cookies

1 stick butter, softened
1 cup sugar
1 cup canned pumpkin
1 egg
2 cups flour
1 tsp baking soda
1 tsp cinnamon
1 tsp nutmeg
1 tsp baking powder

3 tbsp butter, softened
3 cups powdered sugar
3 tbsp milk
2 tsp vanilla (or try 2-3 tsp maple syrup for variety)
  1. Cream the butter and sugar. Add the pumpkin and egg and beat until well combined.
  2. Add all the dry ingredients and blend, careful not to overmix.
  3. Drop the cookies onto a baking sheet and bake for 10-15 minutes, depending on size. I take mine out when they are a bit firm to the touch on the top, but soft underneath.
  4. To make the frosting, combine the last 4 ingredients and whisk until all lumps are gone. Frost the cookies after cooled.

Saturday, November 8, 2008

Gyoza!!!

Let's be honest...I am a glutton for gyoza. There's just something amazing about pork, vegetables, and that salty dipping sauce that I can't get enough of. My friend, Tammy, was dead set on making gyoza and we finally got together to make them this afternoon! Its definitely a good idea to have some help on this recipe, as it can be quite time consuming to assemble and cook 60 gyoza, but so worth the effort!

I got my gyoza recipe from Amy Kaneko's book, Let's Cook Japanese Food! which I bought on sale from Powells over the summer. I chose this recipe over others mostly because the ingredients were easy to come by.


Gyoza

1/2 lb napa cabbage, finely chopped and well drained
3/4 lb ground pork
2 green onions, minced
3-5 shiitake mushrooms, minced
1 tsp ginger, minced
1 tsp garlic, minced
1 tsp sesame oil
1 tbsp sake
1 tsp soy sauce

1 package round gyoza wrappers (about 60 skins total)
1 tbsp canola oil
2 tbsp water for each batch

Soy sauce
Rice vinegar
Chili oil
  1. Gently mix the cabbage, pork, onion, mushrooms, ginger, garlic, sesame oil, sake, and soy sauce (the first set of ingredients above).
  2. To assemble the gyoza, take one gyoza and fill with about 1 tsp of the pork filling. Wipe a bit of water onto the edge of the skin and press skin over to form a seal. To make them prettier (and perhaps more authentic), pleat this closed edge. Set aside on a waxed paper baking sheet. It is important to not let them touch, as they will end up sticking to each other. Keep assembling until you run out of filling or skins.
  3. Heat a large skillet over medium to medium high heat, depending on your stove. Add the canola and sesame oils and coat the pan. When the oil is hot, add the gyoza cooking about 10-12 at a time. Do not atttempt to move them! Cook for 3 minutes or until turning brown on the bottoms. Carefully add 2 tbsp water to the pan and promptly cover. Let cook for an additional 5 minutes, adding a small amount of water if necessary to prevent burning. Remove the lid and cook until remaining liquid evaporates (I turned my gyoza over after removing the lid to avoid any burning).
  4. To make the dipping sauce, mix your desired amounts of soy sauce, rice vinegar, and chili oil.
Since this recipe makes so many, I recommend freezing them flat on a baking sheet. To cook later, thaw them and cook as normal.

Friday, November 7, 2008

Teriyaki Sauce

If you recall my last adventure with tofu, this idea spun out of it. What to do with half a block of tofu?? I ran across this recipe by a simple google search and I absolutely loved it! I had the tastiest lunches the past couple days and my mouth waters for the next go round.

Teriyaki Sauce

1/4 cup low-sodium tamari
2 tsp sesame oil
1 tbsp honey
1 tbsp rice wine vinegar
1 tsp grated fresh ginger
1 tsp finely chopped garlic
  1. Mix all ingredients with your meat (or meat substitute) of choice. (I marinated my cubed tofu for a few hours which was just right.)
  2. Stir fry meat in a hot pan with a bit of oil until cooked. Try to keep as much teriyaki liquid out of the pan for now, as it will splatter and be messy, and burn pretty easily.
  3. Add in reserved sauce and cook until slightly thickened. Note: if this sauce was in contact with raw meat, use at your discretion.
I served mine with short grain brown rice on the side.

Wednesday, November 5, 2008

Sweet and Spicy Almonds

I found this recipe for spiced pecans a while back and filed it away. A couple days ago I finally came around to making it with the almonds I had on hand.

I'm not 100% sold on the final product, but I'm sure they'll grow on me :)


Sweet and Spicy Nuts

2 tbsp butter
3 cups nuts (the original recipe calls for pecan halves)
1/2 cup firmly packed brown sugar
1 tbsp cumin
2 tsp chile powder
1 tsp paprika
1/4 cup cider vinegar
salt to taste

  1. Preheat oven to 350 degrees with rack in middle.
  2. In a large saucepan or skillet, melt butter over medium heat. Add nuts and saute until slightly browned (3-5 minutes). Stir in sugar and cook for about 1 minute until a bit caramelized. Keep a close watch on the mixture because it burns quickly! (Personal experience tells me...a burned the first mixture--oops!) Don't be afraid to turn down the temperature, use your instincts. Add in the spices and vinegar, stir until cider has evaporated. Season with salt.
  3. Spread nuts on a pan in an even layer and bake for 5-10 minutes until crisp.

Monday, November 3, 2008

Jamaican Jerk Spiced Tofu

I found this recipe, thinking I had tempeh waiting to be used...turns out I was wrong! So I decided to use extra firm tofu instead.


Jamaican Jerk Spiced Tofu

1/2 tsp garlic powder
1/2 tsp onion powder
1/2 tsp sugar
1/2 tsp salt
1/2 tsp allspice
1/4 tsp black pepper
1/4 tsp ground ginger
1/4 tsp cayenne pepper
1/2 tsp dried thyme
1/2 block extra firm tofu, cubed
2 carrots, shredded

Vegetable/canola oil for the pan

Combine the spices in a bowl; set aside.

In a skillet, heat oil over medium to medium high heat. Add tofu and stirfry until lightly browned. Add the spices to the pan and toss with tofu, then add carrots.

Serve over rice.

Sunday, November 2, 2008

Garlic Toasts with Red Pepper Aioli

This is one of my favorite recipes, from my favorite chef, Giada de Laurentiis. It's super simple too if you have roasted red peppers on hand.

Garlic Toasts with Red Pepper Aioli

Ingredients

  • 2 garlic cloves
  • 1/2 cup roasted red bell peppers, patted dry
  • 1/3 cup mayo
  • 2 tbsp olive oil
  • salt and pepper
  • 1/2" slices bread (Giada recommends ciabatta, I use Marsee baking Petit Pairs)
  • 2 tbsp olive oil, for drizzling

Method

For the aioli:
In a food processor, finely chop the garlic. Add the roasted red peppers and blend until relatively smooth; add mayo and blend well. With machine running, stream in the olive oil. Season with salt and pepper.
For the toast:
Preheat oven to 400 degrees. Drizzle olive oil over the bread slices. Bake for 5 minutes until golden and slightly crisp.
To serve:
Spoon the aioli liberally on the toasts.

Moroccan Chicken with Tomatoes and Zucchini

This next recipe is from Robin Miller's cookbook. I got it at the library and really enjoyed it for its easy, yummy recipes. The recipe is great for fall when zucchini is in season. The dish tastes very nice over basmati rice to make a meal.

Moroccan Chicken with Tomatoes and Zucchini

Ingredients

  • 2 tsp olive oil
  • 2 cloves garlic, minced
  • 1 1/4 lbs chicken breasts, diced into 2 inch pieces
  • 1 tsp cumin
  • 1 tsp cardamom
  • 1/4 tsp cinnamon
  • 14 oz can diced tomatoes
  • 1 medium zucchini, diced

Method

  1. Heat a skillet over medium high heat, add oil and cook garlic for 60 seconds. Be sure not to burn!
  2. Add the chicken and brown well on all sides. Next, add the spices and cook for another 60 seconds or so.
  3. Add the tomatoes and zucchini and simmer until the chicken is cooked through, 5 minutes or so. Season with salt and pepper.

Pumpkin and Yogurt Corn Muffins

You know what it's like when you've let the dishes pile up in the sink, the bathroom get too dirty, or the laundry become a bit too daunting? Yeah, I have neglected this blog for a couple weeks now which means I've got several things to post today.

I found this mini corn muffin recipe on justbento a few weeks ago and thought it sounded really tasty. Plus, I had some leftover yogurt I needed to use up. Unfortunately, I over baked the muffins and they were practically inedible :( If baked properly, I recommend serving them with some maple butter--mix together softened/melted butter with maple syrup and allow to refirm.


Pumpkin and Yogurt Corn Muffins

Ingredients

  • 1 cup cornmeal
  • 1 cup minus 2 tbsp flour
  • 2 tsp baking powder
  • 1 tsp baking soda
  • 1 tsp salt
  • 1 tsp pumpkin pie spice mix
  • 3 tbsp raw cane sugar
  • 2 eggs
  • 3 tbsp canola oil
  • 1 cup canned pumpkin
  • 1/3 cup lowfat plain yogurt

Method

  1. Preheat oven to 350 degrees. Spray a mini muffin tin.
  2. Whisk the dry ingredients together in a bowl. In a separate bowl, mix together the wet ingredients. Add the wet to the dry and mix until just blended.
  3. Spoon into muffin tins and bake for 20 minutes or so. Be sure not to overbake or they will be dry!

Coco Loco Brownies

I've tried a Rachael Ray recipe for brownies in the past and it was a total disaster...we're talking an inedible hot mess of chocolate and marshmallows. I found a recipe for brownies in her magazine and decided to try it, half blocking out my negative experience and half wondering what would come of it.

I followed the recipe to a tee. Did it seem right? It did not. But I stuck with it. While they are not the best brownies I've ever had, they are extremely delicious and I will recommend the recipe.


Coco Loco Brownies

1 3/4 cups sugar
1 stick butter (I used salted) at room temperature
1 cup unsweeted cocoa powder
3/4 tsp salt
2 tsp vanilla
3 eggs
1 cup flour
1 1/2 whole almonds, roasted and chopped (to roast, stick in the preheated oven until lightly toasted--do not let them burn)
3/4 cup chocolate chips
2 cups shredded sweetened coconut
1/2 cup sweetened condensed milk

  1. Preheat oven to 325 degrees. Line a 9x13 inch baking pan with parchment paper (this will make it much easier to remove from the pan and put onto a cooling rack, preventing the brownies from steaming in the pan).
  2. In a saucepan, cook the sugar and butter over medium heat until bubbling. Remove from heat, stir the cocoa powder and 1/2 tsp salt; cool for 10 minutes.
  3. While cooling, mix the coconut, sweetened condensed milk, and 1/4 tsp salt. Set aside.
  4. Whisk in the vanilla and eggs into the cooled sugar mixture until well blended. Stir in the flour, then almonds. Sprinkle the chocolate chips on top.
  5. Spoon dollops of coconut mixture over the tops of the brownies. Gently pat down any large mounds. Bake until the coconut topping is golden brown and the brownies are set.
  6. Take the brownies out of the pan and let cool on a rack.

Saturday, October 18, 2008

a few new things

I found this recipe a while back in Cat Cora's book, Cooking from the Hip. It's one of those "just wait til the season rolls around" recipes I was really excited about. I've never cooked with squash or lentils before, but it sounded so good I had to try it.


Curried Lentils with Butternut Squash

1 cup lentils
1 small butternut squash, cut into chunks
1 tbsp olive oil
1 tbsp curry powder
1 tsp fresh grated ginger
1 tsp chili powder
kosher salt and pepper to taste
  1. Preheat the oven to 375 and butter an 8x11" dish.
  2. In a saucepan, add the lentils and enough water to cover. Bring to a boil, add the squash, and reduce down to a simmer. Cook for 25-30 minutes until liquid is reduced down and squash is tender.
  3. Strain liquid from vegetables. Return back to pan and mash the squash lightly.
  4. Spoon into the baking dish and bake for 20 minutes until hot.
I served mine over coconut basmati rice (using leftover coconut milk from the cupcakes...) which was delicious!


For dessert, I decided to run with the coconut theme and make some pudding...from another saved recipe.


Warm Banana-Coconut Pudding with Tapioca Pearls

3 cups water
1/3 cup small tapioca pearls
bananas, sliced in half moons
1 14 oz. can coconut milk
1/2 cup sugar
pinch of salt
  1. In a saucepan, bring the water to a full boil. Add the tapioca pearls stirring constantly for 1 minute to avoid clumping. Slightly reduce the temperature to a strong simmer, stirring occasionally for 10 minutes or so. The mixute will thicken considerably.
  2. Add the coconut milk, sugar, and salt and cook for a couple minutes.
  3. Serve hot/warm with banana slices. Garnish with flaked coconut.

Wednesday, October 15, 2008

Japanese Dry Curry with Tempeh

I heard of tempeh from my vegan cookbook a while ago, saw it at the grocery store, decided it looked scary, and didn't buy it. But then I came across this recipe on Just Bento which made tempeh seem a little bit scary. So I went back to the store and picked some up.


All I know about tempeh is it's soybeans, I believe fermented soybeans (same concept as Japanese natto, only not stringy and smelly). If you're interested, check out the wikipedia entry on it or a quick google search. But I do promise, it's not as scary as it seems!

I won't go into too much detail about the recipe, but it was pretty simple. I choppd up some vegetables in a food processor, sauteed them until tender, then added some spices, then the tempeh. Heat through and serve over rice! The recipe made enough for about 4 lunches.

Tuesday, October 14, 2008

Chocolate, Coconut and Rum Cupcakes with Coconut Lime Frosting

Inspired by some leftover limes from an earlier meal (that dry rubbed salmon), I really wanted to make some cupcakes. So much so that I've been dreaming and scheming about them in my head for two days now.

Lime and coconut sounded really good...but then I had an even better idea of adding chocolate to the mix! And what goes better with the semi tropical flavors of lime and coconut then rum?? Off I went to find a chocolate rum coconut lime cupcake, or something like it. Ha. Like that was really going to happen.

I decided I wanted to make chocolate coconut rum cake with coconut lime frosting. I finally settled on a "light" chocolate cup cake recipe by Martha Stewart and decided I'd modify it a bit to incorporate my coconut rum inspiration, plus add a buttercream frosting later.

Chocolate, Coconut and Rum Cupcakes with Coconut Lime Frosting

the cake:
3/4 cup all-purpose flour
3/4 cup sugar
3/4 cup sweetened flaked coconut
1 tsp baking powder
1/2 tsp baking soda
1/4 tsp salt
6 tbsp cocoa powder
3 tbsp hot water
3 tbsp butter, melted
6 tbsp buttermilk
1 1/1 tbsp dark rum
1 large egg
1 large egg white

the frosting:
1/4 cup butter, at room temperature
1 1/2 cups powdered sugar
3-4 tbsp coconut milk, plus more as needed
1 lime, juiced

the recipe:
  1. Preheat oven to 350 degrees. Line 12-cup muffin tin with paper liners.
  2. In a large mixing bowl, combine flour, sugar, baking powder, baking soda, salt, and coconut.
  3. Mix cocoa powder and hot water to form a paste. Add the wet ingredients and stir until smooth and well blended. Whisk in the flour mixture.
  4. Spoon the batter into the muffin tin and bake for 20 minutes, or until an inserted toothpick comes out clean.
  5. Cool on a wire rack.
  6. To make the frosting, whisk all ingredients in a bowl until fluffy. Spread onto cooled cupcakes, and garnish with a bit of flaked coconut.
The cupcakes are quite light in my opinion, not to heavy or dense. While I would normally prefer my cupcakes a bit more dense, I think the texture compliments the delicate buttercream quite nicely. I suppose this is quite dangerous, as I feel I could eat half the batch in one sitting!

Monday, October 13, 2008

Dry-rubbed Salmon Filet

I got this book from the library a few weeks ago. I'll admit, the title did sound kind of boring, but open it up and it's got a great layout, great pictures, and unique recipes. I found myself bookmarking more pages than I ever expected. The first recipe I've made is dry rubbed salmon. Sounds totally different than anything I've ever seen or tried, but wow is it good! I halved the recipe which made about 4 servings.

Dry-rubbed Grilled Filet of Salmon

Ingredients

  • Filet of salmon, approximately 1-2 lbs.
For the rub:
  • 1/2 cup raw cane sugar
  • 1/2 cup cilantro, chopped
  • 1/4 cup grated lime zest, from about 3 limes
  • 1/4 cup coarse sea salt
  • 2 tbsp chili powder
  • 2 tbsp cumin

Method


  1. Mix together all the rub ingredients. Spread evenly over the salmon fillet, gently rubbing into the flesh and let sit at room temperature for 1 hour (or in the refrigerator for 2).
  2. Prepare the grill.
  3. Scrape dry rub off the salmon; grill for 10-12 minutes or until cooked all the way through.

Sunday, October 5, 2008

The Ultimate Caramel Apple Pie

I made this pie for Thanksgiving last year to add some variety to our traditional pumpkin pie dessert. I ran across it on Food Network, it sounded good, so I made it! Little did I know it would be the most delicious pie. EVER. The recipe is by Tyler Florence, one of his "ultimate" recipes from the show, Tyler's Ultimate, where he takes traditional recipes and makes them, well, "the ultimate". Unfortunately for him, following the directions posted to the site will inevitably lead to failure, so let me tell you how to make it the right way.


The Ultimate Caramel Apple Pie
For the crust:

3 cups all-purpose flour
Pinch salt
3/4 cup (1 1/2 sticks) unsalted butter, cold, cut in chunks
2 eggs separated, (yolks for the pastry, whites for the glaze)
5-6 tablespoons ice water, plus more if
needed

For the filling:

1 cup sugar, plus 1/4 for sprinkling on top
3 tbsp water
1/4 heavy cream
1/2 cup red wine
1/2 vanilla bean, split
1 lemon, juiced (optional)
4 Granny Smith apples, cored and peeled
4 Gala apples, cored and peeled
1 tbsp flour
2 tsp cinnamon
Couple pats of butter
To make the pastry, combine the flour and salt together in a large bowl. Cut in the chunks of cold butter with a pastry blender, a little at a time, until the dough resembles cornmeal. Add the 2 egg yolks and the ice water, and blend for a second just to pull the dough together and moisten. Be careful not to overwork the dough. Form the dough into a ball, wrap it tightly in plastic wrap, and let it rest in the refrigerator for 1 hour.

To make the caramel sauce, put the sugar and water in a pot and bring to a slow boil. Do not stir (I learned this lesson the hard way...the caramel does not form if stirred). You want the caramel to take on a nice golden color, but not to the point of burning. After the caramel has formed, swirl the sauce with a spoon to distribute the color evenly. At this time, take sauce off the heat and add the wine and cream, slowly. Return to the heat and cool until thickened and reduced by half, about 10 minutes. Let cool.

Remove dough from refrigerator, cut in half, and return one half to refrigerator. You will need this to warm up a bit in order to roll out the crust later. At this time, preheat oven to 350.

Take the dough roll out on a lightly floured surface. Roll the dough out to a circle a bit larger than the pie pan you will use (I used a 9" glass pan). When rolled to desired size, place into pie pan and push into place.

To prepare the apples, I recommend using the slicing blade on a food processor. Otherwise, you'll need to use a mandolin or slice by hand. In this case, use lemon juice to keep apple slices from browning. However you slice them, (dry if appropriate) toss them with the flour and cinnamon.

Take the apple slices and layer them carefully into the pie crust. Every few layers or so, spoon a bit of the caramel sauce evenly over the apples. Continue this process until the apples are domed up (they will bake down a bit), and top with a few pats of butter.

Roll out the last bit of dough to fit over the top of the pie. Use the leftover egg whites to brush the edges of the pie to act as a glue between the dough. Lay the top crust over the pie and crimp the edges with the bottom to seal. Cut a few slits in the top of the pie to allow for steam to be released. Place the pie on a baking sheet to catch any drippings, and tent pie with foil.

Bake the pie, tented, for 25 minutes. Mix the remaining sugar and cinnamon for sprinkling. Remove the foil from the pie and brush the top with the egg whites, then sprinkle with the cinnamon sugar mixture. Bake for an additional 25 minutes until the pie is nice and golden. Let the pie rest for at least an hour before cutting and serving.

Saturday, October 4, 2008

Quinoa Salad

I discovered a bento blog with a huge range of recipes, based around the Japanese bento style lunchbox. And since I'm always looking for something to eat for lunch, I like perusing the site to get ideas.

I decided to make a quinoa salad to go with dinner one night and it turned out pretty well.


It is better with the addition of fresh tomato slices before serving. Next time, I'll do that and substitute some of the italian parsley for basil. It definitely lasts a few days in the fridge, so it's great to make ahead of time for later.

Sunday, September 28, 2008

Homemade Clif Bars

I love Clif bars...and Luna bars, and Larabars, and so on. So I thought, why not try and make my own? A quick google search landed me a recipe to try.

3 1/2 cups rolled oats
3/4 cup honey
1/2 cup soy protein powder
1 1/2 cups nonfat dry milk
1 tbsp cinnamon
2 egg whites
1/4 cup orange juice
1 tsp vanilla extract
1/3 cup cinnamon roasted nuts, chopped
2/3 cup dried cranberries
1 1/2 bananas, mashed
  1. Preheat oven to 325. Line a baking sheet with wax paper and spray with non-stick spray.
  2. Thoroughly mix the dry ingredients in a bowl. Stir in the wet ingredients until blended.
  3. Put spoonfuls on the waxed paper and shape as you like (I chose bars, but round would make a nice breakfast cookie)
  4. Bake for approximately 15 minutes until the bottoms are golden brown.
Next time, I'll probably switch up the nuts and fruit for a new combination.

Onigiri: Japanese Rice Balls

Onigiri is one of my favorite Japanese snacks/meals. I used to grab a couple from the convenience store for a quick lunch--so good! There's something special about the Japanese smoked salmon, perhaps umami??

I got my Onigiri recipe from Let's Cook Japanese Food! It's a really great basic Japanese cookbook with tons of great recipes. I chose to use leftover rice from dinner, along with grilled salmon. Not as good as the authentic variety, but simple to make. The onigiri recipe is on page 142 for reference. I'm not going to cover the recipe here, but just explain what to do.

Onigiri

Ingredients

  • Japanese style short grain white rice (Nishiki is a good starter brand, available at most grocery stores), cooked and cooled
  • Cooked salmon, flaked

Method

  1. Spoon out a small handful of rice into wet hands. Gently compact rice into a rounded triangle shape (see picture for example); this will be the shape of your rice ball.
  2. Make an indentation in the rice for your salmon filling--I like a wide and deep indentation which better allows for each bite of rice ball to have some salmon.
  3. Place flaked salmon in the indentation, making sure not to overfill, as this will make it difficult to contain.
  4. Take a bit more rice and cover the salmon filling, reforming the triangle shape if necessary.
  5. You can wrap in a piece of seaweed if you like, but I do not recommend this if you plan to store for any amount of time.

This makes a great portable snack or quick lunch while you're on the go. Pack it with a salad and this makes a great lunch.

Fifteen Chocolate Brownies

Jamie Oliver is genius, and it's not just the British accent. I found this recipe in his book, Cook with Jamie: My Guide to Making You a Better Cook. It's got all kinds of recipes in it. I've made his sticky saucepan carrots (which are REALLY good) and his brownies. I can honestly say I've never had better brownies in my life. It's better than even the Ghiradelli mix you can buy at the store. Of course, it's not as easy as adding eggs and some oil, but almost.

Fifteen chocolate brownies (p. 384)

18 tbsp butter
7 oz dark chocolate, broken up (I used a mixture of 80% cocoa and milk chocolate)
3/4 cup cocoa powder
1/2 cup all purpose flour
1 tsp baking powder
1 3/4 cup sugar
4 large eggs, beaten

  1. Preheat oven to 350. Line a 12 inch baking pan with was paper.
  2. In a double boiler (put a large pan over simmering water), melt the butter and chocolate until smooth. Whisk dry ingredients in a separate bowl and add to the chocolate. Finally, add in the eggs until smooth.
  3. Pour batter into the baking pan and bake for 25 minutes. It is important to not over bake these brownies, so do not test with a toothpick.
These brownies are perfectly moist and melt in your mouth. I found they keep for several days without becoming dry--likely due to the under baking.

Sunday, September 14, 2008

something new

Because I'm too lazy to post a recipe, I'll leave you with a recommendation. I found a delicious beer. I like it only because it doesn't taste like beer at all. So here it is:

It is also available in a peach flavor which sounds delicious.

Saturday, September 6, 2008

a little bit vegan

I ended up buying The Complete Vegan Kitchen cookbook a few weeks ago because there were too many good looking recipes in there. Just in the past week I've made two sweet items from it: brownies and coffee cake, both with pretty good results.

Brownies

1/2 cup very hot espresso (you can use strong coffee instead)
1/3 cup cocoa
1 cup sugar
1 tsp vanilla
1/3 cup vegetable oil
1 1/4 cups all-purpose flour
1 tsp baking powder
1/4 tsp salt
  1. To start, preheat oven to 350 degrees and grease an 8" square baking pan.
  2. Whisk the espresso into the cocoa and sugar until smooth (this is where the "very hot espresso" is essential). Add the vanilla and oil.
  3. Gently stir/fold in the flour, baking soda, and salt just until incorporated.
  4. Pour batter into the pan and bake for 35 minutes.
I find these brownies to have a slightly different texture than others I've made. Not fudgy at all, but a bit crumbly instead. I do think the espresso makes an interesting twist.


Coffee Cake

1/3 cup brown sugar
1/3 cup whole wheat flour
1/2 tsp cinnamon
1/3 cinnamon sugar roasted nuts, chopped
2 tbsp canola oil
1 cup all-purpose flour
2/3 cup sugar
3/4 tsp baking soda
1/2 tsp cinnamon
1/4 tsp fresh ground nutmeg
1/4 tsp salt
2/3 vegan sour cream
2 tsp vanilla
  1. Preheat oven to 350 degrees. Grease an 8" square baking dish.
  2. For the coffee cake topping, mix the brown sugar, whole wheat flour, cinnamon, and chopped nuts; add the oil. If the mixture is too dry, add a bit of water until crumbly. Set aside.
  3. For the batter, mix the all-purpose flour, sugar, baking soda, cinnamon, nutmeg, and salt in a bowl. Add the sour cream (I used regular since it was on hand) and vanilla until incorporated. (My mixture was a bit dry, so I added a bit of milk. This again, of course, is not vegan, so I'd substitute soy, rice, or almond milk.)
  4. Pour the batter into the baking dish and sprinkle the topping evenly over the top. Bake for 25-30 minutes.
I really enjoyed this coffee cake, and the best part was how easy it all came together.

Friday, August 29, 2008

applesauce cookies

This recipe is from the Bob's Red Mill Baking Book. And because I am feeling particularly lazy with this recipe (I made it over a week ago and had every intention of posting it, just hadn't gotten around to doing it), I'll provide a link to the recipe online.

Bob's Red Mill actually has quite an extensive recipe catalog on their website which is great.


Applesauce Cookies: http://www.bobsredmill.com/recipes_detail.php?rid=819

Thursday, August 28, 2008

cinnamon roasted nuts

I have a soft spot for cinnamon sugar roasted almonds and walnuts. I don't know what it is, though, they just have such great flavor. A friend let me try a batch she made a while back and I've been hooked ever since. She gave me her recipe as well, so I was in heaven. This past week I bought almonds and walnuts in bulk for the purpose of roasting them up, only it turns out I lost my recipe. A quick google search for a recipe and I was on my way.

Final result:

And now I have 5 cups to devour. Yum :)

Wednesday, August 27, 2008

ricotta ice cream

Giada De Laurentiis is one of my favorite chefs. Every recipe of hers I've tried has been amazing. So when I watched her make this ricotta ice cream on her show a while back, I just had to try it for myself.

The ice cream base itself is really easy to make and the whole recipe comes together in no time. Here's a link to her recipe (I didn't bother making the chocolate filled cones, as I usually enjoy my ice cream in a bowl). I used 2% milk instead of whole since that's what I have on had.


The ice cream does have a strange, grainy texture to it from the ricotta cheese. It's a bit hard to get over I think, but the flavor of the ice cream with the chocolate chips goes together nicely.

I accidentally bought double the amount of ricotta cheese because I couldn't remember if the recipe called for 15 ounces or more. I think I'm going to make a blueberry ricotta ice cream next with all those frozen blueberries I've got. I'm definitely looking forward to trying that batch!

Monday, August 25, 2008

I haven't been cooking much recently, but have made some new additions to my ever growing "to try" recipe collection and even a few new cookbooks. I'm really excited about my new book, Bob's Red Mill, which is filled with hundreds of recipes to bake. I even got it on sale, 50% off at Powell's which is amazing.

If I get with it, I'll start posting older recipes and photos I've still got around.

Wednesday, August 20, 2008

Napa Crusted Pork

I really enjoy herb crusted pork for some strange reason. I've made it three times now, twice with gravy, and it tastes so good! A few days back, I decided once again to pull out this trick using herbs and oil I received from my parents' recent trip to Napa Valley.

This is a fun recipe to try out different herb combinations, fresh or dried. Here is my approximate recipe (I lost the real one). Basically, you're looking for a paste-like consistency. I have used this on a large pork loin cooked in the oven and also a tenderloin grilled outside.

Herb Crust for Napa Crusted Pork

3 tbsp. stone ground or Dijon mustard
2 tbsp. dried herbs*
1 tsp. extra virgin olive oil
1/2 tsp. coarse sea salt
1/8 tsp. black pepper

Make enough of this to coat your meat, whatever size it may be.

*My herbs were a blend of thyme, fennel seed, savory, rosemary, lavender, and cracked bay leaves. I have used an Italian herb blend, as well as a blend of fresh rosemary and thyme.

Sunday, August 17, 2008

budino

Watching an episode of Everyday Italian yesterday afternoon, I found myself inspired to make a chocolate pudding dish I saw. Unfortunately, I later found the recipe online and it required more work than I liked. So I decided to make budino. I actually had it once or twice before after a friend recommended I try a recipe she likes, found on her blog. I made one by Nigella Lawson--I've seen her on Food Network and took a look at one of her cookbooks, she seems to excel at homey, comfort desserts.

Here's a link to her recipe, Budino Di Cioccolato.


I like this recipe because it is quick and relatively easy, plus I had all the ingredients on hand. The consistency is velvety smooth, like the center of a chocolate truffle (like my favorite Moonstruck truffle, Pure Gold), yum! I didn't notice a significant change in texture after letting it cool completely overnight, so I recommend trying it warm and chilled to find what you like best.

Saturday, August 16, 2008

Whole Wheat Pita Bread

I was at Trader Joe's the other day and tried a sample of their quad pack hummus spreads. It was so good I had to buy it! Costs $4.99.
Starting from top, clockwise: Roasted Garlic, Plain, Tomato Basil, Spicy.
To go along with this store bought hummus, I baked up some whole wheat pita bread (that baked into pockets). It's a relatively easy dough to make I found, taking only a few pantry ingredients.
Whole Wheat Pita Bread
I got the recipe from a new vegan cookbook I checked out from the library. I decided to look into vegan and vegetarian cookbooks as a way to prepare balanced meals without animal products as the protein source.

Whole Wheat Pita Bread

Whole Wheat Pita Bread, from "The Complete Vegan Kitchen" by Jannequin Bennett.

Ingredients

  • 2 tsp sugar
  • 2 cups warm water
  • 1 1/2 tbsp dry active yeast
  • 2 cups whole wheat flour
  • 3 cups all-purpose flour
  • 1 tsp salt
  • olive oil

Method

  1. In mixing bowl, combine sugar, 1/2 cup of the water, and yeast; let stand about 5 minutes, until foamy.
  2. Meanwhile, mix both flours and salt in separate bowl.
  3. Add remaining 1 1/2 cups warm water to the yeast mixture, then whisk in half the flour mixture until smooth. Stir/fold in the last half of the flour mixture until combined. Knead the dough until smooth, about 10 minutes by hand (or use a stand mixer with dough hook).
  4. Place dough in bowl with a bit of olive oil in the bottom, turn dough to coat. Cover with a kitchen towel and let rise in warm spot until doubled, about 1 hour.
  5. Preheat oven to 450.
  6. Punch dough down and let rest for 15 minutes. Cut dough into 8 pieces; roll each into 6-8" rounds, with thicker edges.
  7. Place baking sheets in preheated oven for 5 minutes. Then place pita dough rounds onto baking sheet and bake for about 12 minutes, until browned and puffy.
Use for pita sandwiches, or slice into pieces and toast for 5 minutes or so in the oven and serve with hummus!

Thursday, August 14, 2008

Garlic-Basil Mayonnaise

I like the idea of making this as a way to incorporate fresh basil to add a little something extra to a plain sandwich. I got the idea from a recipe by Giada De Laurentiis; Tyler Florence also likes to experiment and make his own mayonnaises in Eat This Book.

Garlic-Basil Mayonnaise

Ingredients

  • 1/4 cup mayonnaise
  • 4-5 leaves basil, chopped
  • 1-2 cloves garlic, minced
  • Splash of lemon juice
  • salt and pepper, to taste

Method

  1. Mix all ingredients together until blended.

Perfect to serve on sandwiches, burgers, or alongside french fries.

Wednesday, August 13, 2008

blueberries continued

I made the best blueberry scones again the other night. I got the recipe from Food Network, it's by Tyler Florence: Blueberry Scones with Lemon Glaze. These are the best scones I've ever had, so yummy! I've made them without the glaze which definitely cuts back on the sugar, but I must say they are WAY better with the glaze. I transfer mine from the baking sheet directly onto a cooling rack, then put the rack over the baking sheet. This way I can add the glaze and the excess drips onto the sheet for easier cleanup.


I used another 2 cups to make multi-grain blueberry muffins last night. Here's a link to the original recipe: Multigrain Muffin, but I'll go ahead and post my slightly modified version. I enjoy this recipe because it is so simple to make and is a little healthier than the average blueberry muffin recipe with the addition of whole wheat flour and oat bran.


Blueberry Multigrain Muffins

1 cup whole-wheat flour
1/2 cup all-purpose flour
1 cup oat bran
2 tsp baking powder
1 tsp baking soda
1/4 tsp kosher salt
2 eggs

1 egg white
1 1/4 cups buttermilk
1/2 cup demarara sugar*
2 tbsp vegetable oil
2 cups fresh blueberries
Start by preheating the oven to 375. Spray or line a muffin tin.
  1. Whisk flours, oat bran, baking powder, baking soda, and salt in a medium bowl.
  2. In a separate bowl, lightly beat the eggs and egg white; add the buttermilk, sugar, and oil. Stir the liquid mixture into the flour mixture until just evenly moist; the batter should be very thick--if not, add a bit more flour.
  3. Toss blueberries with a bit of flour to coat evenly; gently fold into batter.
  4. Fill each muffin cup with batter and bake 25 minutes, or until an inserted toothpick comes out clean. Turn muffins out onto rack and enjoy!


*Substitute with regular brown sugar. I've been experimenting with unprocessed sugars, like demarara sugar which I bought in the bulk section.


Tuesday, August 12, 2008

Blueberry Sorbet

Funny story...my aunt and I decided to go out blueberry picking. We went on a nice, cool morning last week, intending to get a few pounds (I was thinking five tops). A couple hours later we stop and think maybe we went a bit overboard with our picking--which is very easy to do. After all was said and done, we ended up with 16.6 pounds of blueberries in the car, oops!

I've been trying to make some things using up my share of the blueberries, but you can only eat so many baked goods at a time. So far, I've frozen 8 cups, given 4 away, used 6 for the sorbet (recipe to follow), 2 for scones, and have about another 5 or so left. Needless to say, I'll be baking something up again tonight.

Blueberry Sorbet

Blueberry Sorbet

Sunset Magazine, June 2008

Ingredients

  • 1 cup water
  • 3/4 cup sugar
  • 1/4 tsp salt
  • 6 cups fresh (or frozen) blueberries
  • 3 tbsp lemon juice

Method

  1. Bring water and sugar to a boil; add salt and simmer 2 minutes. Transfer to a metal bowl and cool to room temperature (I put mine in the fridge for 15 minutes or so to speed up the process).
  2. In a blender, puree sugar syrup, blueberries, and lemon juice. Strain mixture through a fine sieve to remove blueberry skins. Cover and chill at least 30 minutes.
  3. Freeze in ice cream maker (about 30 minutes in a Cuisinart machine) and transfer to freezer container.

I love this recipe because it's easy to make and everyone loves it. It only takes a few ingredients from the pantry and its done in about an hour, start to finish. Best of all, it uses up a bunch of blueberries!